How To Diy A Shaggy Haircut In Minutes Or Less
Introduction
The shag haircut is a classic style that has been around for decades. It is characterized by its layered, textured look. Shag haircuts are flattering on most hair types and can be styled in a variety of ways.
If you are thinking about getting a shaggy haircut, but you are not sure if you want to go to the salon, you can always try DIYing it. DIY shaggy haircuts can be done in minutes or less, and they can save you a lot of money.
In this blog post, I will show you how to DIY a shaggy haircut. I will provide step-by-step instructions, as well as tips and tricks.
Materials Needed
- Hair clippers
- Scissors
- Comb
- Hairbrush
- Point cutting shears (optional)
- Texturizing shears (optional)
- Hairspray
Instructions
- Wash and condition your hair as usual.
- Blow-dry your hair until it is 80% dry.
- Gather your hair into a high ponytail.
- Using the hair clippers, cut the ponytail to the desired length.
- Release the ponytail and comb your hair through.
- Using the scissors, cut layers into your hair.
- Point cut the ends of your hair to create texture.
- Texturize your hair with texturizing shears, if desired.
- Apply hairspray to your hair to hold the style in place.
Tips and Tricks
- When cutting the layers, start with the bottom layer and work your way up.
- Cut the layers at different lengths to create a more textured look.
- Point cut the ends of your hair to create even more texture.
- Texturize your hair with texturizing shears, if desired.
- Apply hairspray to your hair to hold the style in place.
Conclusion
DIY shaggy haircuts are a great way to save money and get a trendy haircut. By following these simple instructions, you can easily DIY a shaggy haircut in minutes or less.
Here are some additional tips for DIY shaggy haircuts:
- If you are not sure how to cut your own hair, you can always watch a tutorial on YouTube.
- It is important to use sharp scissors when cutting your hair. Dull scissors will make it difficult to get a clean cut.
- Be careful not to cut too much hair at once. It is always better to start with less and add more as needed.
- If you are not happy with the results, you can always go to the salon and have them fix it.
I hope this blog post has helped you learn how to DIY a shaggy haircut. If you have any questions, please leave a comment below.
Are you looking for a way to give your hair a shaggy, textured look? If so, you're in luck! There are a few different ways to achieve this look at home, and we've put together a guide to help you get started.
First, you'll need to gather your supplies. You'll need a pair of sharp scissors, a comb, and some texturizing spray. Once you have your supplies, you can follow these steps:
- Wash and condition your hair as usual.
- Comb your hair through and divide it into sections.
- Start by cutting the layers in the back of your hair. Use the scissors to point-cut the ends of the hair, creating a shaggy, textured look.
- Repeat step 3 for the layers in the front of your hair.
- Once you're happy with the shape of your haircut, apply some texturizing spray to add volume and texture.
That's it! You've now mastered the art of shaggy hair diy. For more information, visit Hairstyle Glow Beauty.
FAQ of shaggy hair diy
Q: What are the different types of shaggy haircuts?
A: There are many different types of shaggy haircuts, but some of the most popular styles include:
- The classic shag: This is a versatile style that can be worn long or short, and it works well for most hair types.
- The wolf cut: This is a more edgy style that is characterized by its choppy layers and long, side-swept bangs.
- The mullet: This is a polarizing style that is making a comeback, and it features short sides and back with longer hair on top.
Q: What are the benefits of having shaggy hair?
A: There are many benefits to having shaggy hair, including:
- It is a very versatile style that can be dressed up or down.
- It is flattering on most face shapes and hair types.
- It is easy to style and maintain.
- It adds volume and texture to hair.
Q: How do I DIY a shaggy haircut?
A: If you are feeling adventurous, you can try DIYing a shaggy haircut at home. However, it is important to note that this is a challenging haircut to do yourself, and it is best to have a professional do it if you are not confident in your skills.
If you do decide to DIY your shaggy haircut, here are some tips:
- Start with clean, dry hair.
- Use sharp shears and a thinning shear.
- Start by cutting the hair in layers, working from the top of the head to the bottom.
- Be sure to leave some length at the bottom so that you can style the hair.
- Layers should be uneven and choppy.
- Finish by adding texture to the hair with a texturizing spray or product.
Q: What are some common mistakes to avoid when DIYing a shaggy haircut?
A: Here are some common mistakes to avoid when DIYing a shaggy haircut:
- Cutting too much hair off.
- Not leaving enough length at the bottom.
- Making the layers too even.
- Not adding enough texture.
Q: Is shaggy hair good for fine hair?
A: Yes, shaggy hair can be a great style for fine hair. The layers and texture help to add volume and movement to the hair, which can make it look thicker and fuller.
Q: Is shaggy hair good for curly hair?
A: Shaggy hair can be a good style for curly hair, but it is important to choose the right layers and cut. The layers should be shorter on the bottom and longer on the top, which will help to frame the face and keep the hair from getting too weighed down.
Image of shaggy hair diy
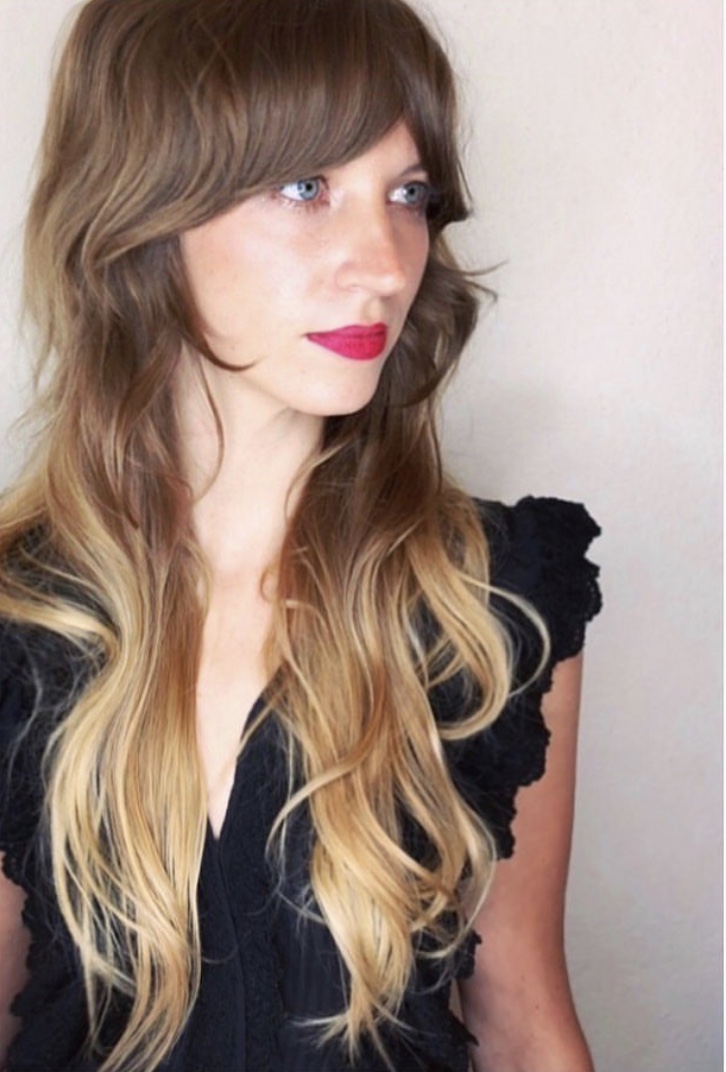
- Long, layered shaggy hair: This style is perfect for long hair that you want to add some volume and texture to. To achieve this look, simply layer your hair and use a texturizing spray to add some grit.

- Wavy shaggy hair: This style is perfect for wavy hair that you want to let loose and air-dry. To achieve this look, simply apply a sea salt spray to your hair before you blow-dry it.
:max_bytes(150000):strip_icc()/GettyImages-138845325-8f3b30d3c42944098d42b27c85d20477.jpg)
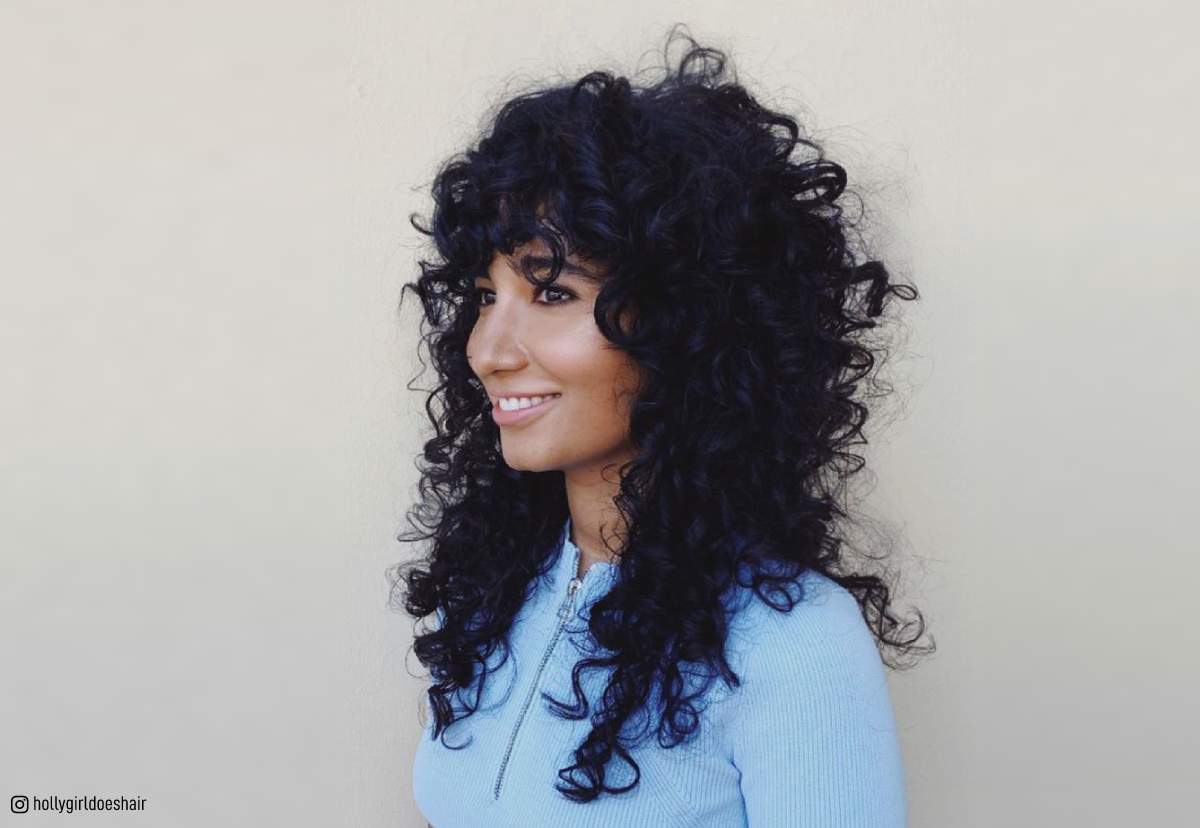
- Curly shaggy hair: This style is perfect for curly hair that you want to define and add some volume to. To achieve this look, simply apply a styling cream to your hair and let it air-dry.
- Short shaggy hair: This style is perfect for short hair that you want to add some edge to. To achieve this look, simply layer your hair and use a texturizing spray to add some grit.

- Messy shaggy hair: This style is perfect for days when you want to look effortless and cool. To achieve this look, simply tousle your hair with your fingers and add a bit of texturizing spray.

- Boho shaggy hair: This style is perfect for those who want to add a bit of 70s flair to their look. To achieve this look, simply layer your hair and use a texturizing spray to add some grit. Then, add some braids or twists for a more bohemian look.
- Straight shaggy hair: This style is perfect for those who want to keep their hair simple and sleek. To achieve this look, simply blow-dry your hair straight and use a texturizing spray to add some grit.

- Asymmetrical shaggy hair: This style is perfect for those who want to add some edge to their look. To achieve this look, simply cut your hair with an asymmetrical shape and use a texturizing spray to add some grit.

- Cropped shaggy hair: This style is perfect for those who want to keep their hair short and edgy. To achieve this look, simply cut your hair into a cropped style and use a texturizing spray to add some grit.

Post a Comment for "How To Diy A Shaggy Haircut In Minutes Or Less"